Motion & simulation
Wind and Jiggle without a cache, the Simulate node on the guides (every host), nHair in Maya, and a round trip to other packages.
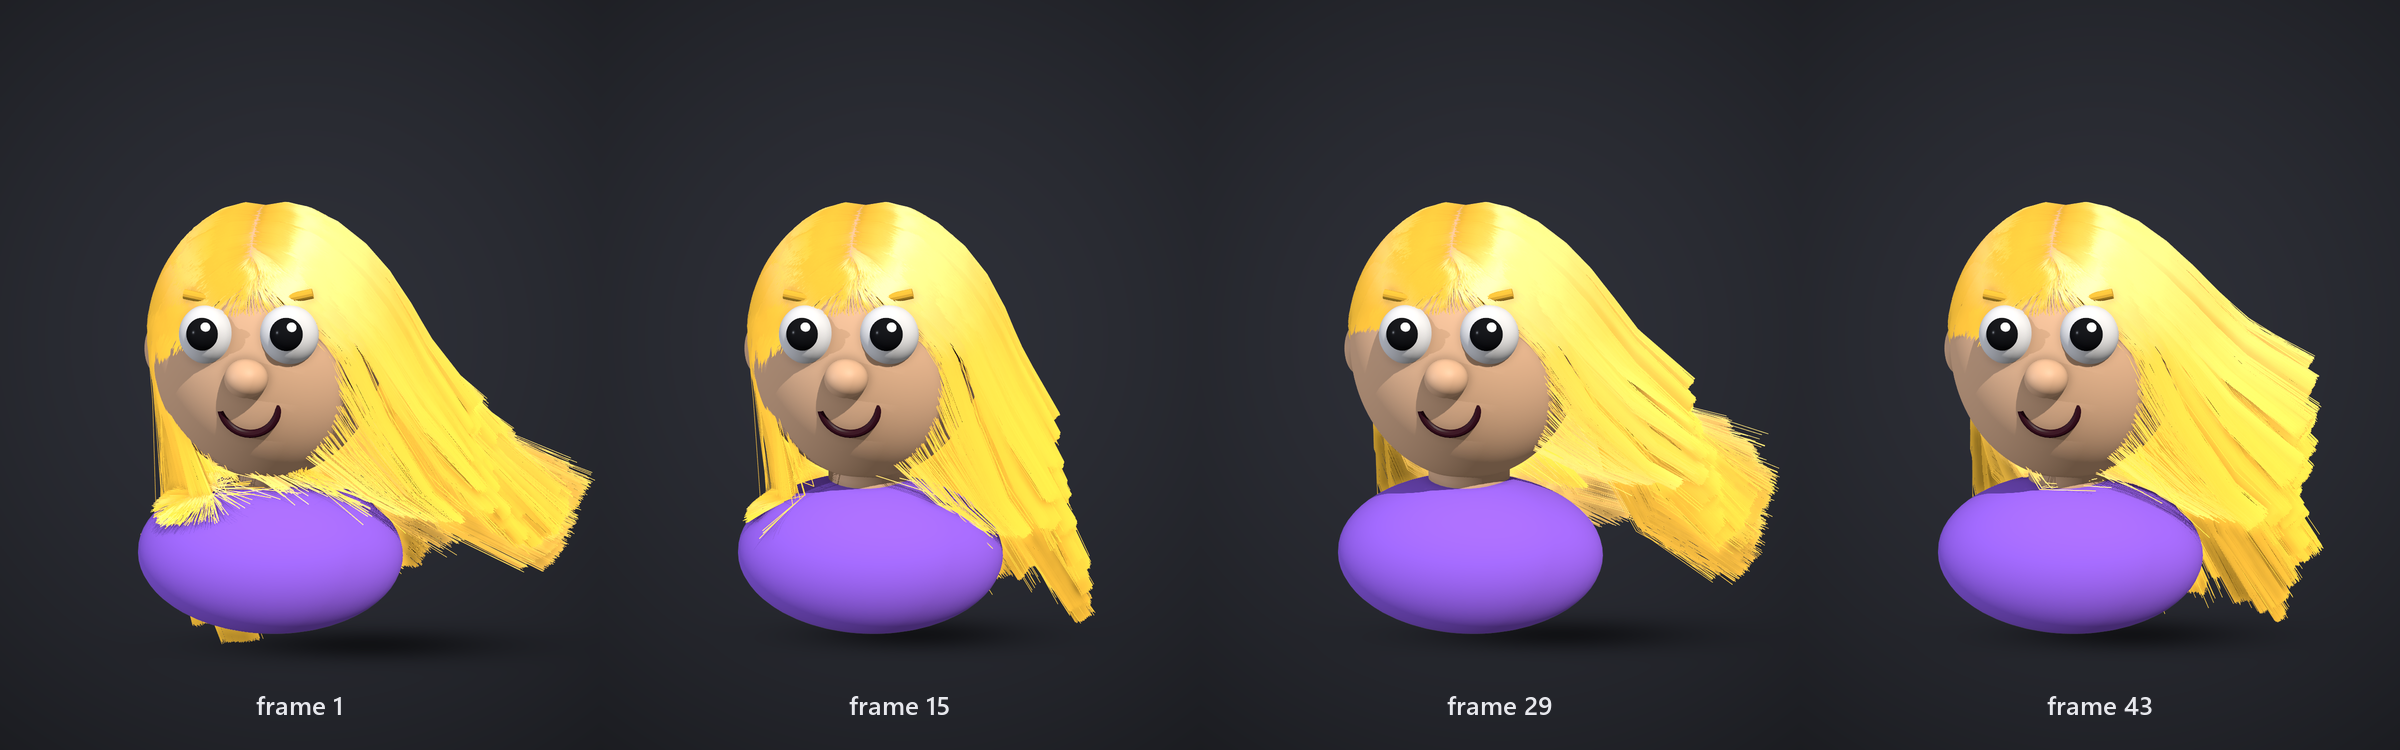
Motion without a cache
Two nodes (Add Node > Motion) move the groom with no simulation and nothing cached. Each frame is worked out from the time and the scalp's last few frames, so shots scrub in any order and render on the farm frame by frame, the same every time.
| Node | What it does | Main parameters |
|---|---|---|
| Wind | Bends strands in a wind that gusts and travels over time. | direction, strength, gust, frequency, speed, turbulence |
| Jiggle | Strands trail the head's motion, overshoot when it stops, and settle. | amount, frequency, damping, history |
- Play the timeline to see them.
- Both keep roots and segment lengths, and work on strands or guides.
- Bypass (B) or delete either and the groom is exactly as it was.
- Key their parameters like any other (right-click > Set Key, or S over a field): a
wind that picks up, or turns (
directionkeys as X Y Z). See Animating parameters.
groomlab.add_wind(groom, direction=(1, 0, 0), strength=0.3)
groomlab.add_jiggle(groom, amount=1.0)
Simulate the guides
The Simulate node (Add Node > Motion) is GroomLab's own hair simulation: put it between the guides and Interpolate and the guides swing under gravity and the head's motion, drag in the air and the wind, and stay out of the scalp and a collider; the strands grown from them follow. It runs in Maya, in the standalone app, in groom files and on the farm, with the same results.
- Play to see it. Playing or scrubbing past the frames simulated steps it on from the last one; scrubbing back reads the frames kept. Changing a setting, or grooming the guides, simulates again from the start frame.
- Simulate, bake, render. Simulate Range fills the frames of the playback range; Bake Simulation writes them to an Alembic guide cache (one per Simulate node, beside the scene or the groom file) that renders, exports and the farm read instead of simulating. A bake made with other settings than the node has now is ignored (it says so) and the node simulates.
- Bypass (B) gives the groom exactly as it was; before its start frame the guides are as groomed.
| Parameter | What it does |
|---|---|
stretchStiffness | How strongly segments keep their length (1: hair does not stretch). |
bend, twist | How strongly the guides keep their groomed curves and twist (0: a rope). |
rootStiffness | How firmly each part is held to its groomed shape, root to tip: stiff roots, free tips. |
damping, drag | How quickly the swinging dies out; air drag (and the pull of the wind). |
gravity, gravityDirection | 980 in centimeters, straight down. |
windSpeed, windDirection, windGust, windFrequency | A gusting wind the hair drags toward (Wind's gusts). |
inertia | How much of the head's motion the hair feels (lower: less floppy; 0 moves with the head). |
collideScalp, collisionOffset, friction | Keeps guides off the scalp and the collider input's mesh. |
repulsion, repulsionRadius | Guides pushed apart where they bunch (off by default). |
substeps, iterations | Accuracy: steps per frame, constraint passes per step. |
startFrame | Where it starts at rest; a few frames before the shot let the hair settle. |
cacheMode | live simulates as you play; cached only in Simulate Range (other frames as groomed). |
water, waterLevel | Water (off by default): below the surface, the plane at waterLevel (world Y) or the mesh on the water input. |
buoyancy, waterDrag | Under water: an upward pull as a share of gravity (above 1 the hair floats up); drag far stronger than the air's. |
currentSpeed, currentDirection | A gently varying current the hair drifts with under water. |
dryTime, wetWeight, rain | Wetness: seconds to dry out of the water; how much heavier and limper wet hair is; rain wetting it with no forces. |
Water and wet hair
With water on, hair below the surface floats (buoyancy), slows and swirls (waterDrag) and
drifts with the current; the forces fade in over a thin band at the surface, so nothing jumps as
hair crosses it. The simulation writes a wetness channel on the strands, per point, 0 dry to 1
soaked: it rises within a quarter second under water (or in the rain) and dries over dryTime.
The look reads it like any channel: map a Clump's strength to {"attribute": "wetness"} for wet
hair gathering into locks, and HairColor's mask (with a dark tipColor and a flat tipProfile)
to darken it. Bakes carry the wetness, so renders read it too. The underwater_hair preset
does all of this.
In Maya: GroomLab > Simulation > Add Simulate Node, Simulate Range, Bake Simulation, Clear Simulation. In the standalone app the timeline grows Simulate, Bake and Clear while the graph has a Simulate node, and a strip under the scrubber shows the frames simulated (emerald) and baked (blue); a saved groom names its bakes.
from groomlab import sim

node = sim.add_simulate(groom, bend=0.6, startFrame=-10)
sim.simulate(groom, end=120)           # Simulate Range
sim.bake_simulation(groom)             # the bake renders and exports read
sim.invalidate_simulation(groom)       # simulate again from the start frame
Follow the scalp
On an animated head the groom normally grows again on every frame, on the scalp as it is. Turn
on Follow Scalp (Attribute Editor > Inputs, followScalp) and it grows once, on the rest
mesh, and each strand is then carried to the moving scalp by its root: a turn and a move of the
skin under the root (its face's edge and normal), no stretch. Every strand keeps its rest shape,
and only the carrying runs from frame to frame: playback, exports and every motion blur key are
much cheaper (the evaluation at rest is shared by all keys).
- Needs a rest mesh (below). Without one, or on a frame at rest, the groom is exactly what it is with Follow Scalp off.
- What keeps its place: guide curves, simulated guides and guide caches are world-space positions of the current frame: each is taken back to rest through its root, so the strands they shape come out where they are.
- What is read at rest: colliders (Collide), ImportCurves' curves, Wind's direction and its gusts, and Noise and other effects that work in world space are evaluated on the groom at rest and then carried, so they turn with the head instead of staying put in the world. Collide against a moving body, or wind blowing one way in the shot, look different: turn Follow Scalp off for those grooms.
- Jiggle reacts to the head's motion as it does unfollowed (its scalp history is turned into rest space).
- No stretch: a scalp that stretches carries the roots apart but the strands keep their rest size.
- Exports, Arnold (both render modes) and groom files follow too: the flag is stored in the
.groomfile.
groomlab.set_follow_scalp(groom, True)Simulate in Maya (nHair)
nHair is still there beside the Simulate node: GroomLab > Simulation > Simulate Guides (nHair) builds nHair curves for the primary guides, with follicles on the scalp. Children follow their simulated parents, so the whole groom moves.
- Presets:
fur,short,long,bouncyandwet. - Bake Simulation to Cache writes the posed guides to Alembic and drops the live sim, so playback is fast and scrubbable.
- Remove Simulation returns to the groom as authored. The authored guides never change.
from groomlab import sim

made = sim.create_sim_curves(groom, "primary", preset="long", collide=True, preroll=20)
sim.bake_sim(groom, "shot010.guides.abc", made)
Round trip to Houdini and others
- Export Guides for Simulation... Each curve carries its guide ID as
strandId; keep that attribute through the simulation. - Simulate in your package of choice.
- Load Guide Cache... brings the result back. The cache blends between samples, so motion-blur subframes are smooth.
sim.export_guides(groom, "guides.abc", "primary", start=1, end=100)
sim.set_guide_cache(groom, "sim.abc")
Motion blur
Give the groom a rest mesh on a deforming scalp, so the strands match between motion samples
(and turn on Follow Scalp for the cheapest keys). The rest mesh stays put while the character's
transform or rig moves: it is the mesh's own points, placed where they were when it was set.
Instances on the strands blur with them; turn on the Instance node's pinToRest so simulated
guides that stretch don't slide them along the strands.
Shot fixes
Correctives (Groom Tools > Sculpt) sit on top of the groom like sculpt layers. Fix Frame makes one that blends in and out around the current frame, with keyable weights, and renders include them.